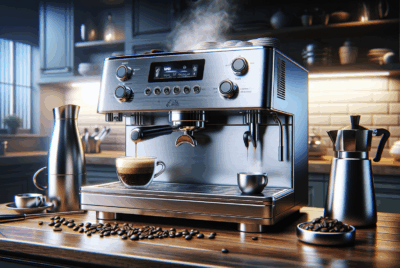
Latte Art Tips: Master Your Coffee Creations
As an Amazon Associate, I earn from qualifying purchases, at no additional cost to you. Disclaimer
Creating latte art is a fun way to show creativity with every cup of coffee. To make great designs, I start by steaming milk to the right texture.
The key to beautiful latte art is silky smooth milk foam. It pours smoothly, letting me create hearts, rosettas, or even tulips.

For those just starting out, practicing your pour is the most important step. I like to begin by pouring slowly, with my hand steady. This helps me control the flow and create sharp lines in my design.
Whenever I practice, I feel more confident in my skills. Every cup is a chance to improve and try something new. Latte art isn’t just about the final look; it’s a journey of creativity and exploration for coffee lovers like me.
Understanding Latte Art Fundamentals
Mastering latte art requires attention to detail and practice. I focus on making excellent espresso and steamed milk to create beautiful art. Understanding the role of each component is key to success.
Components of Latte Art
Latte art depends on two main components: espresso and milk. A well-pulled espresso shot provides a rich crema, the reddish-brown surface essential for contrast.
I make sure to use fresh espresso beans and a burr grinder for the best flavor.
For milk, achieving microfoam is crucial. It creates a smooth, velvety texture that allows me to pour intricate patterns.
The balance between steamed milk and foam is key. This requires patience and careful technique, focusing on the milk’s texture and temperature for the best results.
The Role of Milk in Latte Art
Milk quality greatly influences latte art. Whole milk is popular due to its ideal balance of fats and proteins. When frothing, I aim for a temperature between 150°F and 155°F, which helps maintain sweetness and texture.
Steamed milk should reach a point where microfoam forms tiny bubbles. This is when the milk expands its volume without losing stability.
For non-dairy options, like almond or oat milk, I choose brands known for frothing well. This way, my designs remain crisp and clear.
Espresso Basics for Latte Art
Good latte art starts with good espresso. Proper espresso extraction develops the rich, golden crema crucial for art.
Using an espresso machine with consistent pressure ensures a quality shot. The selection of espresso beans matters too.
I prefer medium to dark roast beans for their richness. Grinding just before brewing, I use a burr grinder for uniformity.
The shot should pull in about 25-30 seconds—a short window that can make all the difference for flavor and crema thickness.
Preparation Techniques for Latte Art
Creating beautiful latte art requires paying close attention to several key aspects. You need to master milk steaming, perfect your espresso extraction, and develop precise pouring techniques.
Each step involves specific skills and tools like a steam wand, milk frothing pitcher, and fresh beans.
Milk Steaming and Texturing
The journey starts with steaming and texturing milk. I always use a steam wand for creating the perfect consistency.
The goal is to achieve smooth, velvety microfoam which is essential for latte art. I carefully position the steam wand just below the milk surface to introduce air, aiming for a temperature between 140°F and 150°F.
Overheating can ruin the microfoam, while underheating leads to watery milk. Milk frothing pitchers are important as well, often featuring a spout design to aid pouring later.
Practice is crucial. With more practice, you can master making a creamy, glossy finish. I find that practicing at home with online tutorials helps in refining the skills needed.
Espresso Extraction for Perfect Crema
To get the perfect base for latte art, the espresso shot must have good crema. Fresh beans ground with a burr grinder ensure quality.
I pay careful attention to tamping techniques. Firm and even tamping helps water distribute evenly through the coffee grounds.
Crema color and depth help evaluate the quality of the extraction. A rich, caramel-colored layer indicates a successful shot.
I always preheat my coffee mug to help maintain the temperature. Once the crema is good, I’m ready to create the art.
Latte Art Pouring Techniques
Pouring is where latte art comes to life. Holding the cup at a slight angle helps the milk float on the surface.
I start pouring from a distance to mix the espresso and milk, then move closer for more detailed patterns.
The milk frothing pitcher spout plays a key role in shaping the art. Detailed designs like hearts or rosettas require steady hands and practice. Layering the milk helps create contrast and depth in the art.
Tutorials often show step-by-step visuals, which I find particularly helpful. Even if you’re just starting, keep practicing in coffee shops to improve your skills.
Latte Art Designs and Techniques

When it comes to latte art, many designs and techniques can elevate your coffee game. From starting with simple patterns like hearts and tulips to mastering intricate designs like swans and phoenixes, I will guide you through various levels of latte art. Additionally, I’ll discuss conscientious practices in etching and layering that ensure respect for the beverage.
Basic Latte Art Patterns
Starting with basic patterns is a good way to build skills. The heart design is often where beginners start, as it just needs a steady hand and a bit of confidence. Learning this opens the door to creating the tulip design, which involves layering hearts to form a flower pattern.
The rosetta is another popular choice. It mimics leaf or flower-like patterns and requires good milk control. Mastering these forms helps build a solid foundation for more complex shapes.
Many online courses and tutorials focus on these basic designs, so exploring them can be beneficial. Tools like cocoa powder can sometimes be used to enhance these designs.
Advanced Latte Art Creations
Once you’re comfortable with the basics, you can explore more intricate designs like swans and phoenixes. These designs demand precision and a refined touch.
The swan design involves creating a rosetta and the artful addition of a swan’s neck. The phoenix, with its elaborate wings, illustrates the blend of creativity and skill.
To reach this level, taking specialized online courses may be necessary. Advanced techniques often incorporate elements like chocolate syrup to highlight designs. With practice and patience, these designs become achievable. They let you express artistry while serving a visually stunning coffee.
Ethics of Etching and Layering
Etching and layering add another dimension to latte art. Etching involves drawing designs on the foamy surface, usually with a tool. While it allows for greater detail, I must consider that it can sometimes alter the drink’s texture.
Layering involves creating depth and a 3D effect by stacking patterns. The technique can enhance visual appeal but often requires more milk, which may not suit everyone. The key is to respect the integrity of the coffee while beautifying it. Combining etching with toppings like cocoa powder or chocolate syrup should always consider the drink’s taste and character.
Perfecting the Craft

When it comes to mastering latte art, steady practice and choosing the right equipment are key. Identifying and learning from common mistakes is also crucial for improvement.
Practice Routines for Consistency
Consistency is crucial in creating stunning coffee art. I devote time each day to practicing my milk steaming and pouring techniques.
Repetition helps refine my skills and introduces muscle memory, which is essential in creating intricate patterns.
Creating a routine means setting aside regular times and goals. Some days I focus on a single design, while other times I experiment with new patterns.
Tracking progress helps maintain motivation. Starting with simple designs, like a heart or tulip, allows building a solid foundation. Gradually, I try more complex designs as my confidence grows.
Selecting the Right Tools
The right tools make a big difference in latte art quality. My espresso machine is reliable, delivering consistent espresso shots.
I use a high-quality milk frother and a milk frothing pitcher with a pointed spout for precise pouring.
Milk temperature is important too. I steam the milk to about 150°F for optimal texture. And, I choose whole milk because it foams better than low-fat options.
A burr grinder ensures my coffee grounds are the perfect consistency, helping achieve a rich espresso base for the art.
Learning from Common Mistakes
Common mistakes can hinder progress, but recognizing them is the first step toward improvement.
One mistake I often made was inconsistent milk frothing due to incorrect temperature or technique. I now pay extra attention to milk steaming, ensuring it’s velvety and smooth.
Pouring too fast or too slow can ruin designs, so I focus on steady, controlled movements. I’ve learned to hold the cup at an angle, letting the pour merge into the espresso consistently.
Practicing patience is essential, as rushing leads to errors. With time, refining these techniques becomes second nature.
Showcasing Your Art

Sharing latte art with others can enhance the experience and bring joy to coffee lovers. By using creative strategies, you can present your art effectively in a coffee shop, engage with the larger coffee community, and participate in competitions. These steps can help your work gain the attention it deserves.
Presenting Latte Art in Your Coffee Shop
When I showcase my latte art in a coffee shop, presentation is key. I make sure each coffee mug is adorned with creative designs that catch the eye.
Setting up a dedicated display area can draw customers in. I also use well-lit spots, which highlight the details of the art.
I often use shelves or trays to create a mini gallery of my creations. This allows customers to see a range of designs at once.
Sometimes, I host live demonstrations during peak hours. This gives customers a chance to see the process and appreciate the skill involved.
Engaging with the Coffee Community
To engage with the coffee community, I use social media effectively. I post regularly, sharing both finished latte art and some behind-the-scenes content.
Tutorials or short videos are particularly popular and can attract new followers. I focus on platforms where coffee lovers gather to ensure my content reaches the right audience.
I also take part in online courses and discussions. This helps me stay updated on trends and connect with other baristas who share my passion.
Attending local meetups or virtual events provide opportunities to learn, share, and grow. These interactions often lead to collaborations or simply provide inspiration for new designs.
Latte Art Competitions and Events
Participating in competitions can elevate the recognition of my work. I select events that match my skill level, ensuring I can perform at my best.
Preparing involves extensive practice, as mastering new designs is crucial. Competing enables me to see different styles and techniques, which expands my creativity.
Events often provide a platform to meet other artists and judges, which can be invaluable for feedback. Watching others compete, I learn new approaches and ideas.
Winning isn’t the only benefit; simply participating boosts confidence and exposure. Engaging with these events solidifies my place within the coffee art world.
Frequently Asked Questions

In this part, I aim to answer common questions about latte art. Whether you’re a beginner or looking to refine your skills, I’ve got some tips for everyone.
How can beginners start learning latte art?
I suggest starting with simple designs like hearts or tulips. Practice pouring from a pitcher with a steady hand.
Consistent practice and patience are key.
What are the essential techniques for creating latte art?
Use a strong base of espresso and micro-foamed milk. The angle and height at which you pour are crucial.
Begin with simple techniques and gradually work on more complex designs.
Which milk is best suited for making latte art?
Whole milk is my go-to choice because it froths well. If you prefer a non-dairy option, try oat milk.
It has a nice texture and steams similarly to cow’s milk.
How does one achieve the perfect milk texture for latte art?
I aim for microfoam with tiny bubbles that looks glossy. Steam the milk until it reaches around 150°F (65°C).
Swirl the milk to integrate the foam evenly.
What factors affect the quality of latte art when pouring?
Pouring speed, pitcher control, and milk consistency play crucial roles. I also pay attention to the initial contact point of the milk with the espresso.
Start with a steady pour, then move closer for more defined patterns.
What are some simple latte art designs for beginners to practice?
For starters, I recommend the heart or the rosette design. These are simple yet foundational.
Practicing them helps improve your pouring technique and control.


