Espresso on the Stove: Simply Delicious
As an Amazon Associate, I earn from qualifying purchases, at no additional cost to you. Disclaimer
Introduction
There’s something satisfying about brewing your own cup of coffee, especially when it’s a robust, flavorful espresso made on the stove. There’s a world of rich flavors and unique experiences waiting to be discovered with espresso on the stove, and I’m thrilled to share a tips with you. Are you ready for a delicious journey?
History of Stovetop Espresso
The Birth of Espresso
Espresso has a storied history that started in Italy in the early 20th century. It was created as a solution to decrease employees’ coffee break time. Later on, as its robust flavor and rich aroma became famous, it turned into a global phenomenon.
Evolution of Stovetop Espresso Makers
Stovetop espresso makers, also known as moka pots, were introduced by an Italian engineer named Alfonso Bialetti in 1933. The simple yet effective design has remained largely unchanged over the years, with the iconic octagonal shape becoming a symbol of Italian coffee culture.
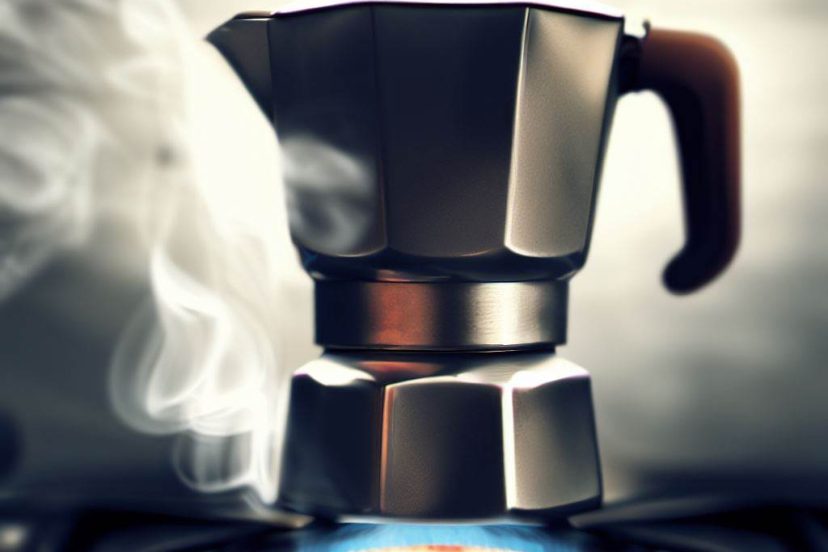
The Anatomy of a Stovetop Espresso Maker
The moka pot, as we like to call it, may seem like a complicated contraption at first glance, but it’s remarkably simple once you understand its anatomy. It consists of three primary components, each playing a crucial role in brewing your espresso. Let’s delve into each part to get a better understanding.
The Bottom Chamber (Boiler)
This is where the brewing process begins. You fill this chamber with water, which is heated to generate steam pressure. The bottom chamber screws onto the top one, sealing in the pressure. A little tip here, don’t fill the water past the safety valve. It’s there to release excess pressure and overfilling could cause it to be blocked, making the pressure build up dangerously high. Trust me, cleaning up after a moka pot explosion is not fun!
The Middle Chamber (Funnel Filter)
This is where your coffee grounds go. It’s a funnel-shaped metal filter that fits into the bottom chamber. You fill it with coffee and then the water in the boiler chamber below, when heated, is forced up through this filter. This is where the real magic happens. I personally like a medium-fine grind for my stovetop espresso. It’s fine enough to extract a strong flavor but coarse enough to keep the water from passing through too quickly.
The Top Chamber (Collector)
The final destination for your brewed espresso. As the water is forced through the coffee in the funnel filter, it makes its way up into this chamber, filling it with rich, bold espresso. When you see the coffee starting to ‘gurgle’ into this chamber, that’s your cue to remove the moka pot from the heat. Pro tip: Try not to let all the water pass through. Removing it from the heat just as it starts to gurgle will avoid the risk of any burnt or bitter flavors.
Why Choose Stovetop Espresso?
As a coffee lover, I’ve explored a multitude of brewing methods, and each holds its charm. But let’s delve into why espresso on the stove often takes the prize.
Authenticity
Stovetop espresso is akin to taking a trip to Italy without leaving your kitchen. The method offers an amazingly authentic espresso experience that echoes tradition. While it doesn’t exactly replicate the high-pressure extraction of an espresso machine, it results in a strong, rich coffee that is more intense than standard drip or French press coffee.
There’s a reason why it’s a staple in Italian homes, it keeps the espresso tradition alive, and it gives a unique sense of satisfaction, a bit like baking your own bread or brewing your own beer. I personally find this morning ritual very satisfying and typically use Café Bustelo for it’s rich flavor.
Control
Brewing espresso on the stove is akin to being a maestro conducting an orchestra. You are in control of every single aspect. You can choose your coffee beans, your grind size (medium-fine works best), your water temperature, and your brewing time.
I recall when I first started, my espresso would come out too bitter. It took me a while to realize I had been leaving the moka pot on the heat for too long. Once I figured out to remove the pot from the heat just as the coffee started to gurgle into the top chamber, the flavor profile changed drastically.
Remember, it’s all about fine-tuning your technique to fit your palette. Don’t get discouraged if it doesn’t come out perfect the first time. It’s part of the journey, and every misstep is a step towards mastering your brew.
Affordability
This point hits home for most of us. Espresso machines can be an extravagant expense and might not be feasible for everyone. In contrast, a decent moka pot won’t burn a hole in your pocket. You can find a variety of them in the market within a very affordable range.
The moka pot I use? It’s a simple, classic 6-cup Bialetti that I bought years ago, and it still serves me flawlessly. So, for those looking to explore the world of espresso without committing to a pricey machine, the stovetop espresso maker is your best friend. It seems like the longer I’ve used it, the better the taste, so I think it’s a skill worth mastering for any true coffee lover.
How to Brew the Perfect Stovetop Espresso
Ahh, brewing espresso on the stove. It’s an art, a science, and a labor of love. Let’s break down the steps.
Choosing Your Coffee
The first and arguably the most critical step is choosing the right coffee beans. For a rich, flavorful espresso, opt for high-quality, freshly roasted beans. I mentioned Café Bustelo earlier, and its a very reasonably priced choice you can get in most stores. And if you’re just starting out, I highly recommend it. And when you’re ready, you can start exploring specialty coffee roasters to discover the depth and complexity espresso can offer.
A nice Arabica-Robusta blend offers a fantastic balance of flavor and strength, just what you need for a hearty espresso. And remember, fresher is always better. Look for beans that have been roasted within the last month and grind them fresh for each brew.
Grinding Your Beans
Now, onto the grind. For espresso on the stove, aim for a grind that’s somewhere between the fineness of espresso and the coarseness of drip coffee. A fine grind might clog your moka pot and result in an over-extracted bitter brew, while a coarse grind may lead to a weak, under-extracted espresso. I learned this the hard way when I used a grind that was too fine and ended up with a bitter, barely drinkable brew.
Invest in a good burr grinder that offers a range of grind sizes. It can make a world of difference to your brew.
Brewing Process
Once you’ve filled the bottom chamber with water and the funnel filter with your freshly ground beans, it’s time to assemble your moka pot and place it on the stove. Use low heat to ensure a slow and steady extraction.
Here’s a pro tip: Wrap the bottom part of the moka pot with a cold wet towel just when the coffee starts to gurgle. This stops the extraction process immediately, preventing the over-extraction that can occur from residual heat. It was a trick a barista friend shared with me, and it’s helped me avoid many a bitter brew.
The Final Touch
Now that you’ve brewed your perfect stovetop espresso, you might want to consider the final touch. For me, it’s serving it in a warm espresso cup and taking a moment to appreciate the aroma before taking the first sip. It’s these little rituals that make stovetop espresso brewing a truly rewarding experience. I have to admit that some mornings I’ll warm the cup with a bit of milk to add creamy flavor and texture.
Troubleshooting Common Issues
Brewing espresso on the stove is a bit of an art, and at first it can come with its fair share of challenges. Don’t be disheartened; these issues are all part of the learning curve. Here are some common problems you may encounter and my personal advice on how to overcome them.
Bitter Coffee
This is a common issue for novice stovetop espresso brewers. If your espresso tastes bitter, it could be due to over-extraction. Over-extraction occurs when your coffee grounds are exposed to hot water for too long, causing the extraction of bitter, unwanted flavors. This happened to me frequently when I started brewing, and I found two potential solutions.
First, you can try using a coarser grind. A coarser grind will slow down the extraction process, allowing you to extract the desirable flavors without the bitterness. Secondly, you could remove the pot from the heat sooner. As I mentioned before, wrapping the bottom part of the moka pot with a cold wet towel when the coffee starts to gurgle is an effective way to halt the extraction process immediately.
Weak Coffee
If your coffee is too weak, it may be under-extracted. Under-extraction happens when the water passes through the coffee grounds too quickly, not extracting enough flavor. I remember a time when I invited a friend over for coffee, and my espresso came out weak. It was slightly embarrassing, but it led me to research and understand under-extraction.
To tackle this, try using a finer grind to slow down the extraction process. Alternatively, you could leave the pot on the heat a bit longer, giving the water more time to extract the flavors from the coffee grounds.
Coffee Tastes Metallic
This issue usually arises when your moka pot needs a good cleaning or has not been properly rinsed and dried after the last use. Remember, never use soap on your moka pot, as it can leave a residue that affects the taste of your coffee. Rinse each part with warm water and let it air dry. It’s something so simple, but it’s an easy step to overlook.
Moka Pot is Leaking
If your moka pot is leaking during the brewing process, it’s usually due to a worn-out or improperly placed seal. Make sure to check the rubber gasket and the safety valve before each use. Replacements are usually available from the manufacturer or online, and they’re easy to change. Also be sure to screw it together securely, making certain it’s a tight fit.
Conclusion
There you have it, a comprehensive guide to making espresso on the stove. It may take some trial and error, but with patience and practice, you’ll be brewing perfect cups of stovetop espresso in no time. So, are you ready?
Happy Brewing!
-Carla
Frequently Asked Questions (FAQs)
1. Can I use any type of coffee for stovetop espresso?
While you can technically use any coffee, for the best results, choose high-quality, freshly roasted beans.
2. How do I know when my stovetop espresso is ready?
Your stovetop espresso is ready when the top chamber of the moka pot is filled with coffee.
3. Can I make espresso on the stove without a moka pot?
Making espresso without a moka pot on the stove is challenging. The moka pot is specially designed to brew a coffee close to espresso.
4. How do I prevent my stovetop espresso from tasting burnt?
If your espresso tastes burnt, it might be due to overheating. Ensure you use low heat and remove the moka pot from the stove as soon as the brewing process is complete.
5. Is stovetop espresso as strong as machine espresso?
Stovetop espresso is strong and flavorful, but it is slightly less concentrated than machine espresso. However, it’s an excellent and affordable alternative for home brewing.