How to Use Breville Espresso Machine: Master Your Coffee Brewing Skills
As an Amazon Associate, I earn from qualifying purchases, at no additional cost to you. Disclaimer
Making a perfect cup of espresso with a Breville machine is simple once you know the basics. I’ve spent time understanding every detail, and it truly transforms the coffee experience at home.
The key is using fresh coffee beans and the right grind size to make the most of your Breville machine.

Each Breville model may have different features, but the main steps are often similar. I pay close attention to the water temperature and pressure settings; these make a big difference in taste.
I also recommend experimenting with these features to find the flavor that suits you best.
Keeping your Breville clean is important for maintaining great coffee taste. I make sure to wipe the machine daily and descale it regularly. With a little routine maintenance, I always enjoy a delicious espresso every time.
Understanding Your Breville Espresso Machine
To use a Breville espresso machine well, it’s key to know its parts and how to set it up. This will make brewing smooth and enjoyable.
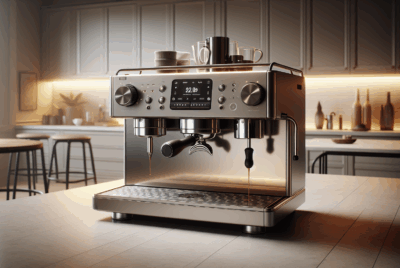
Anatomy of the Breville Espresso Machine
I always start by getting familiar with the parts. The control panel is at the front and lets me set the brew strength and volume.
Buttons and dials allow me to choose settings easily.
The bean hopper is on top, holding whole beans before grinding. I ensure it’s always filled with high-quality coffee beans.
Next, the portafilter locks into the machine. It holds the ground coffee during brewing. I must handle it carefully to prevent spills.
The machine has a water filter system, often at the back. I check it regularly to maintain clean water, which keeps my espresso tasting great. Lastly, the water level indicator shows how much water is in the tank. Monitoring this prevents interruptions during brewing.
Setting Up Your Breville Espresso Machine
I begin by placing the machine on a stable surface. After plugging it in, I fill the tank with clean water, using the water level indicator to ensure accuracy. Then I install or replace the water filter if needed.
Next, I fit the portafilter, securing it in place without forcing it. I adjust the settings on the control panel based on my taste preferences.
Some models provide a user manual with detailed instructions, which I find helpful for understanding unique features.
Finally, I add beans to the bean hopper. Checking settings one last time, I start the machine. Soon, I’m ready to enjoy a perfect cup of espresso made just how I like it.
Getting Started With Your Espresso Journey
To make great espresso, I focus on choosing the right coffee beans, perfecting the grind, and ensuring good water quality and temperature. These steps are key to creating a flavorful and rich cup every time.
Selecting Coffee Beans
I begin by picking high-quality coffee beans. This choice sets the foundation for the espresso’s flavor. I prefer beans that are fresh and packaged properly. Whole beans are my go-to as they retain flavor longer than pre-ground options. It’s best to store them in an airtight container in a cool place to keep them fresh.
When selecting beans, I look for coffee roasts that match my taste. Light roasts offer a bright and tangy flavor, while dark roasts give a bold and rich taste. The roast date on the bag is important to ensure I’m using fresh beans.
Exploring different origins and blends is also exciting. I enjoy trying beans from various regions, as they each have unique flavors. Sampling small amounts helps me find my favorite taste.
Understanding Grind Size
The grind size is crucial in making espresso. Getting it right affects both the flavor and the extraction process.
I always adjust my grind setting based on the beans I’m using. Fine grinds usually work best for espresso, but the specific setting may change.
I start with a fine grind and test it. If the espresso tastes sour, I try a slightly finer grind. If it tastes bitter, I make it a little coarser. This small adjustment helps find the perfect balance.
Proper grinding requires a good coffee grinder. Burr grinders are my choice, as they give consistent results compared to blade grinders. It’s a small investment for much better espresso.
Water Quality and Temperature
The water quality and temperature are critical when making espresso. I use filtered water to avoid strange tastes that tap water might add. Good water brings out the true flavors of the coffee beans.
Water temperature is equally important. I typically preheat my espresso machine to around 195-205°F. This range ensures that the coffee extracts properly. Too hot, and it burns; too cold, and it under-extracts. Preheating the machine also guarantees temperature stability throughout the brewing process.
Maintaining these water qualities allows me to enjoy the rich and complex flavors a good espresso offers.
Preparing the Espresso Machine

When preparing the Breville espresso machine, I focus on two main tasks: filling the water tank and ensuring the machine is adequately heated. These steps are essential for a smooth operation.
Filling the Water Tank
To begin, I first locate the water tank at the back of the machine. I remove the tank and fill it with fresh, cold water up to the maximum fill line. Using a properly fitted water filter is crucial to improve the water quality and enhance the flavor of my espresso. A good filter helps remove impurities and can extend the life of the machine. Once filled, I carefully slide the tank back into place, ensuring it is securely attached.
I make sure there are no leaks before proceeding. This step ensures a steady water supply during brewing, avoiding interruptions and delivering consistent espresso shots. Filling the water tank properly is a simple step but vital for optimal performance.
Heating and Preheating
Heating the espresso machine is a critical step I never skip. I start by turning it on and giving it a few minutes to reach the right temperature. Many Breville machines have indicators or lights that let me know when they’re ready. Preheating ensures that both the machine and my cup are at an ideal temperature.
I can do this by running a shot of hot water into the cup. This step prevents the espresso from cooling down too fast as it’s poured. Proper temperature control helps maintain the flavor and aroma of the coffee. I find this makes a noticeable difference in the quality of each cup, delivering that perfect espresso experience.
Grinding Coffee Beans

Using a Breville espresso machine starts with grinding coffee beans just right. The built-in grinder lets me adjust the grind size to get the best flavor. I’ll guide you on how to use this feature and set the grind to suit my taste.
Using the Built-In Grinder
I start by filling the bean hopper with fresh coffee beans. It’s important to use beans that are suitable for espresso. I place the hopper on the top of the machine and secure it in place. The built-in grinder simplifies the process, making it easy.
To activate the grinder, I select the amount of coffee I need. Most machines have a dial or button to adjust this. Watching the grinding process ensures it’s consistent. The ground coffee should be collected in the portafilter.
This grinder is both a time-saver and a space-saver. It combines grinding and brewing, so I don’t need extra equipment. Plus, I can enjoy freshly ground coffee anytime I want an espresso.
Adjusting Grind Settings
Grind size makes a big difference in flavor. To adjust the grind, I usually find a knob or lever on the side of the grinder. Each setting affects how fast or slow water passes through the coffee, changing its strength.
If my espresso tastes too bitter, I might try a coarser setting. For a brew that’s too weak, a finer grind often helps. I adjust in small steps, tasting to see the difference each makes.
Experimentation is key. Each machine can be different, so I need a bit of practice to find my perfect grind. Consistent adjustment helps me enjoy the espresso just the way I like it.
Tamping the Ground Coffee

Tamping is a crucial step in espresso making. It involves pressing the ground coffee evenly and with the right pressure. This ensures the water flows through the coffee evenly, leading to a better extraction.
Proper Tamping Techniques
To tamp the coffee grounds correctly, I focus on consistent pressure. I aim for about 30 pounds of pressure. I use a tamping mat to stabilize my hand.
It’s important to distribute the coffee evenly before pressing. I do this with a gentle shake or a light tap on the counter.
I also use a flat, even surface to press down. A level tamp ensures the water extracts the coffee properly. After tamping, the coffee should look smooth, with no loose grounds.
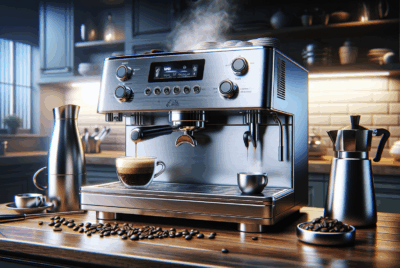
Brewing the Perfect Espresso

Brewing the perfect espresso involves preparing the portafilter, starting the brewing cycle, and considering both shot size and extraction time. Each step plays a vital role in ensuring a rich, flavorful shot from a Breville espresso machine.
Locking In the Portafilter
I start by ensuring the portafilter is dry and clean. This step is crucial for a smooth extraction. I fill it with freshly ground coffee, leveling it to ensure consistency. Using the right amount of coffee is important; I aim for about 18-20 grams.
I tamp down evenly, pressing firmly but not too hard. The goal is to create a flat, compact surface. Once ready, I carefully lock the portafilter into the machine, listening for a secure click.
Starting the Brewing Process
To begin brewing, I switch on the Breville espresso machine, allowing it to heat up. This ensures the water reaches optimal temperature. I double-check water levels in the reservoir; it’s important to have enough for the full cycle.
Once ready, I hit the brew button, initiating the process. A steady stream of espresso should pour out, forming a rich crema on top. Consistency in flow indicates a well-executed brew.
Espresso Shot Size and Extraction Time
Determining shot size requires attention. I generally aim for about 1 to 2 ounces for a single shot. For a double, this increases to 2 to 3 ounces. Using a scale can help measure accurately.
Extraction time is another crucial factor. I aim for around 25-30 seconds. If the shot pulls too quickly, I adjust the grind finer. For a slower pull, I make it coarser. This ensures balanced flavors in my espresso.
Milk Frothing for Lattes and Cappuccinos
Frothing milk is a key step in making a great latte or cappuccino. I’ll guide you through using the steam wand and some effective frothing techniques to make sure you get the perfect texture.
Using the Steam Wand
The steam wand is essential for frothing milk.
First, fill a frothing pitcher with cold milk, about halfway. Turn on the steam wand to let out any water, then insert it just below the milk’s surface.
Tilt the pitcher slightly and lower it until you hear a hissing sound. This sound means air is getting in to create foam.
Once you see bubbles, lift the pitcher to steam the milk even more. Keep the wand angled to whirl the milk, ensuring a smooth, silky texture.
Stop steaming once the pitcher feels slightly warm. Be careful not to overheat the milk as it can scorch. Proper use of the steam wand creates a creamy base for both lattes and cappuccinos.
Milk Frothing Techniques
Different techniques can change the milk’s texture.
For a latte, I aim for a smooth and velvety microfoam. This requires keeping the wand deeper in the milk after introducing air for froth. The foam should be creamy, not bubbly.
For cappuccinos, I focus on creating thicker foam. This involves keeping the wand near the surface longer to trap more air. The result is a dense layer of froth.
I often gently tap the pitcher on the counter to let bubbles rise and swirl the milk to mix the foam evenly. Each drink gets its specific froth, enhancing the espresso’s flavor and texture.
Easy Cleaning and Maintenance
Keeping your Breville espresso machine clean ensures it performs well and lasts longer. Daily cleaning and regular descaling are key to maintaining your machine.
Daily Cleaning Routine
Every day, I take a few minutes to clean my Breville espresso machine.
I start by emptying the drip tray and washing it with warm, soapy water. It’s important to also wipe down the exterior with a soft, damp cloth to remove any coffee stains or smudges.
I always remember to purge the steam wand after each use to prevent milk residue from building up. This involves a quick blast of steam and then wiping the wand with a damp cloth.
Next, I remove the portafilter, rinse it under warm water, and ensure there’s no leftover coffee ground. Keeping the basket clean prevents clogs.
Before calling it a day, I run a blank shot of water through the machine to clear out any remaining residue. This simple routine keeps my espresso machine in top condition.
Descaling Process
Every three months, I descale my Breville espresso machine to prevent mineral buildup inside.
First, I prepare a descaling solution, usually following the instructions on a descaling packet, and add it to the water tank. It’s essential to aim for the right solution to protect the machine’s internals.
I then run the solution through the machine by initiating the brew cycle. It’s vital to capture the liquid in a container.
Once the solution has cycled through, I rinse the water tank thoroughly and fill it with clean water.
To remove any leftover residue, I run clear water through the machine a few times. This steps ensure that my espresso always tastes fresh and that my machine doesn’t suffer from mineral-related issues.
Troubleshooting Common Issues
When using a Breville espresso machine, I often see two common problems: espresso that turns out weak or watery, and challenges with milk frothing. Addressing these can improve your coffee experience.
Weak or Watery Espresso
I ensure my espresso isn’t weak by first checking the grind size. If the grind is too coarse, water flows too quickly through the coffee, leading to weak espresso.
I set the grinder to a finer setting for more resistance, allowing the water to extract more flavor.
Another factor is tamping pressure. A light tamp can result in low pressure, so I apply firm pressure when tamping to create a packed and even coffee bed.
If my espresso still seems off, I check the coffee-to-water ratio. I use less water or more coffee for a stronger brew. Keeping the Breville machine clean ensures consistent pressure and extraction quality.
Problems With Milk Frothing
When I face issues with milk frothing, I first check the steam wand for clogs. A clogged wand can prevent proper steaming.
I clean the wand thoroughly by purging it with steam to remove any milk residue.
I use fresh, cold milk, as it produces better froth. Holding the pitcher at the right angle so the wand tip stays just below the milk surface helps me create microfoam.
I make sure to introduce air in the beginning and then immerse the wand deeper to heat the milk. If I see large bubbles, I adjust until the froth is creamy and smooth.
Regular maintenance of the Breville machine’s steam system keeps everything working well.
Enhancing Your Coffee Experience
Using a Breville espresso machine can lead to an exceptional coffee experience. By focusing on gaining barista skills, trying different coffee strengths and flavors, and picking up useful tips, I can craft the perfect cup.
Mastering Barista Skills
Becoming skilled at making coffee starts with practice and knowledge.
I begin by learning the art of milk frothing, which is essential for creating drinks like lattes and cappuccinos. Temperature control is critical. Properly steamed milk should be between 150-155°F for the best texture and taste.
Next, I focus on espresso extraction. It’s crucial to grind coffee beans to the right size. A fine grind allows water to extract flavors effectively without over or under-extracting. Timing is key too. The ideal espresso shot takes about 25-30 seconds.
Consistency is important for every cup. I make notes on grind size, tamp pressure, and extraction time to achieve consistent results. By honing these skills, I bring barista-quality coffee into my home.
Exploring Coffee Strengths and Flavors
Experimenting with coffee strengths and flavors enriches my coffee journey.
I start with understanding the coffee-to-water ratio. Adjusting this ratio changes how strong or mild the coffee tastes. A good starting point is a 1:2 coffee-to-water ratio for espresso.
Trying different beans also impacts flavor. Arabica beans often offer smooth and sweet flavors, while Robusta beans provide a stronger, bolder taste. Exploring single-origin beans can reveal unique flavors specific to a region.
Tasting notes help in exploring flavors. I might taste hints of fruits, nuts, or chocolate, depending on the coffee type. By expanding my palate, each cup offers a new experience that stays exciting and satisfying.
Tips and Tricks From Coffee Enthusiasts
Coffee lovers share many tips that improve my coffee-making routine.
One tip involves preheating the machines and cups to maintain warmth and enhance taste. This simple step keeps the espresso hotter for longer.
Cleaning the machine regularly is essential. I use vinegar solutions or coffee machine cleaners to prevent buildup and ensure the machine runs smoothly.
Investing in fresh, high-quality beans makes a noticeable difference in taste. I store beans in airtight containers to keep them fresh longer.
Finally, I always experiment. Trying new techniques, beans, and recipes keeps the coffee journey fresh and enjoyable. Following these insights, I enhance my coffee experience every day.
Frequently Asked Questions
I’ve found that using a Breville espresso machine involves some key steps like setting it up, frothing milk, and following the right order for adding coffee and water. Regular cleaning is essential, and there are also simple ways to troubleshoot common issues.
What are the initial setup steps for a new Breville espresso machine?
When setting up a new Breville espresso machine, I first unpack everything and make sure I have all the parts.
I rinse the water tank, fill it with fresh water, and place it back. Then, I insert the portafilter and run water through the machine to clean it.
How do you froth milk using the steam wand on a Breville espresso machine?
To froth milk, I begin by filling a jug with cold milk.
I then place the steam wand just below the surface of the milk. I turn the steam dial to start frothing, listening for a hissing sound, and move the jug to create a whirlpool effect until the milk is creamy.
In what sequence should coffee and water be combined in a Breville espresso machine?
I start by adding water to the machine’s tank. Then, I place the coffee grounds in the portafilter and lock it in place. I turn on the machine and select the desired coffee option. This order ensures the best brewing process.
What is the proper way to clean and maintain a Breville espresso machine?
I make sure to clean the portafilter and group head after each use.
I use a damp cloth to wipe down the steam wand and purge it before and after each use. Regularly descaling the machine as per the manual’s instructions helps keep it in good working order.
How can you make a latte using a Breville espresso machine?
To make a latte, I pull a shot of espresso into a cup.
I then froth milk using the steam wand until it’s smooth and creamy. I pour the frothy milk over the espresso, holding back the foam initially to create layers, and then top it off with the foam.
What troubleshooting steps should be taken if a Breville espresso machine is not functioning correctly?
If the machine is not working, I first check that it’s properly plugged in and that there is water in the tank.
I make sure the portafilter is securely locked. If it’s still not working, I refer to the user manual for additional troubleshooting tips.